How to Install Soffit and Fascia
By True North Eaves · Updated June 26, 2026
What soffit and fascia are
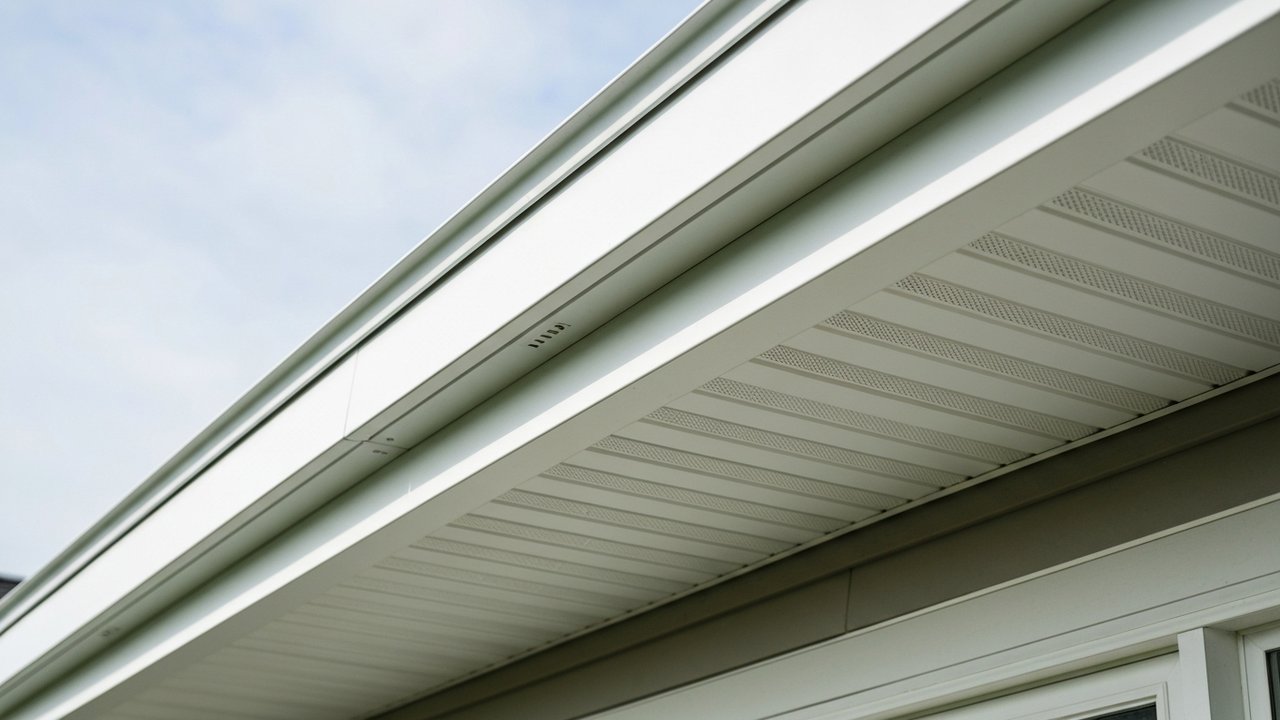
Fascia is the vertical board that runs along the lower edge of your roof. It is what your eavestrough (also called a gutter) mounts to, and it covers the exposed ends of the rafter tails. Soffit is the material that closes off the underside of the roof overhang, the horizontal surface you see when you stand at the wall and look up. Together they protect the rafter structure from weather, keep birds and insects out of the eave cavity, and through the vent openings in the soffit, allow outside air to circulate into the attic.
Both pieces take a beating over the years. Fascia sits directly behind the eavestrough and gets soaked whenever the trough overflows or backs up. Soffit sits in shade and traps moisture. When either starts to fail, it usually pulls the other along with it, which is why most replacement projects tackle them at the same time.
Gather tools and materials before climbing the ladder
There is nothing more frustrating than being halfway up a ladder and realising you forgot the caulk. Get everything on the ground first.
For fascia:
- Fascia board in your chosen material (vinyl, aluminum, or primed exterior wood) cut or ordered to rough length
- Galvanized or stainless-steel nails or ring-shank screws (plain steel will rust and streak the board within a season)
- Exterior-grade caulk
- Primer and paint if using wood
- Pry bar, hammer, miter saw or circular saw
For soffit:
- Soffit panels or planking in vinyl or aluminum
- F-channel or J-channel (the receiver strips that the soffit slides into at the wall and at the fascia)
- Tin snips or aviation snips for aluminum, or a circular saw with a fine-tooth blade running backward for vinyl
- Chalk line, tape measure, level
You will also need a stable ladder with standoff arms so it does not lean directly against the fascia you are about to remove. A helper who can hold material and pass things up is genuinely useful, not just nice to have.
Remove the old material
Start at the eavestrough. If you plan to reuse it, take it down carefully, setting each section aside in order. Most hangers are screwed into the fascia every 60 to 90 centimetres. Once the eavestrough is down, the fascia comes off next. On older homes it is usually nailed through into the rafter tails; on newer ones it is more likely screwed. A pry bar and patience handles both.
Soffit typically comes off once the fascia is gone. On vinyl systems it often slides out of the channels. On older wood-framed eaves it may be nailed and will need careful prying to avoid damaging the nailer behind it.
Inspect the wood before you build anything
This is the step most DIY jobs skip, and it is where projects go wrong. Probe every rafter tail with a flat screwdriver once the old fascia is off. Solid wood will resist the point. Rotted wood sinks in with almost no pressure. What causes fascia rot explains the underlying mechanics, but the practical reality is that a clogged eavestrough can hold water against the fascia for months at a time, and the rot that causes is not always visible from outside.
Damaged rafter tails need to be sistered or replaced before anything new gets attached. Cut the compromised section back to solid wood and bolt a new length of dimensional lumber alongside the existing rafter. If you find more than two or three tails in rough shape, the scope of the job has expanded and it is worth pausing to decide whether to bring in a crew.
Check the soffit nailer as well. This is the horizontal ledger nailed to the house wall that the inner edge of the soffit rests on. North-facing eaves and shaded corners are where it tends to go soft first.
Install the fascia
Fascia goes on before soffit because the soffit typically slots into the back of the fascia or a channel at the fascia edge.
Cut each board to length. If using wood, prime all faces including the cut ends before you nail anything up. Skipping this step is one of the most common reasons wood fascia rots within a few years of installation. Paint the primed board after it is up, not before.
Fasten the fascia through into the rafter tails themselves, not just into the soffit nailer framing. Each fastener point should land on a rafter, not float between them. Butt joints where two lengths of board meet must also fall on a rafter tail so both ends are secured. Floating joints will open up as the wood moves and let water in behind the board.
Use galvanized or stainless fasteners throughout. For vinyl or aluminum, follow the manufacturer’s fastener spacing and leave a small gap at every butt joint for thermal expansion. In Alberta and the Prairies where temperatures swing from plus 35 in summer to minus 35 in winter, that allowance is not optional.
Caulk every joint, every mitre, and every spot where the fascia meets a different surface.
Install the soffit
With the fascia in place, you can set up your receivers. You need a channel at each end of the soffit run: one along the house wall (the inside edge) and one at the fascia (the outside edge). Many vinyl and aluminum fascia profiles include a built-in groove for the outer soffit edge. If yours does not, nail an F-channel to the inner face of the fascia. Nail a second F-channel or J-channel to the house wall at the same height.
Snap a chalk line to confirm the wall-side channel sits level before you nail it. An unlevel channel means every panel will tilt slightly, and across a long run that is visible.
Cut soffit panels to width. The width is the distance from the back of the wall channel to the back of the fascia channel, minus roughly a centimetre on each side to allow the panels to slide in without binding. On aluminum, tin snips cut cleanly. On vinyl, use a fine-tooth blade running backward in a circular saw to avoid cracking the edge.
Slide each panel one end at a time: insert the wall-side edge first, then snap or guide the outer edge into the fascia channel. Do not nail soffit panels tight. They need room to move with temperature changes or they will buckle when summer heat arrives. Vent panels should be distributed across the run rather than grouped in one place. A common starting point is one vented panel for every two or three solid panels, but soffit ventilation explained walks through how to calculate what your specific attic actually needs.
Matching materials to Canadian conditions
Vinyl soffit and fascia dominate the Canadian market for good reasons: it does not rot, insects leave it alone, and it is straightforward to work with. The trade-off is that it becomes brittle in extreme cold. Cutting vinyl on a Prairie job site in January can crack the material. If you can schedule the work for a mild day, even early spring or fall, the cuts will be cleaner.
Aluminum holds up better in extreme cold, expands and contracts less dramatically, and is non-combustible. For homes in wildfire interface zones in Alberta or British Columbia, aluminum (or steel) soffit and fascia is a meaningful upgrade over vinyl. Our soffit service covers both options if you want a professional assessment for your home.
Wood soffit and fascia is the right choice for heritage homes or where the look genuinely matters. Painted cedar or spruce looks excellent and lasts well if you commit to repainting every several years. Let the paint go and the wood will not survive a decade in a wet climate.
When to hire a professional
Some jobs belong to a crew rather than a weekend DIY project. Consider getting a professional quote if:
- The roof is two storeys or more, or has sections that require extension ladder work beyond your comfort level
- You found significant rot on more than a couple of rafter tails, or the soffit nailer needs replacing across a long run
- The roofline has dormers, hip sections, or complex angles where mitres need to be cut precisely to keep out water
- The eavestrough is also failing and you want everything replaced at once
- You are not comfortable working with both hands occupied on a ladder for an extended period
A soffit and fascia installation done right should hold for a decade or more without attention. One done with inadequate prep, unsealed joints, or unprimed wood will need attention again inside of a few years. If you want to book a free assessment to get an honest read on your roofline’s condition, we can tell you whether the scope is reasonable for a capable homeowner or whether a professional crew is the better call.
Frequently asked questions
Can I install new soffit without replacing the fascia at the same time? Yes, if the fascia is in solid shape. Remove the old soffit, inspect the nailer and rafter tails, and fit new panels. The soffit connects to the fascia at the outer edge, so just confirm your new channel or receiver is compatible with whatever profile the fascia uses. If the fascia is starting to soften or the paint is peeling badly, replacing both at once saves climbing the ladder twice.
Does soffit have to be vented? In most Canadian jurisdictions, yes. Building codes require adequate attic ventilation, and soffit vents are the primary air intake for that airflow. A fully sealed soffit traps moisture in the attic over winter and can contribute to ice dams and mould. Soffit ventilation explained covers the airflow calculations if you want to plan the vent layout before you buy panels.
What material holds up best in a Canadian winter? Vinyl handles typical Canadian winters well and is the most common choice across the country. Aluminum is the better pick in extreme cold climates and in wildfire-prone areas because it is both more durable in temperature swings and non-combustible. Wood remains a good option where appearance is the priority, with the understanding that it needs regular painting to last.
How do I know if there is rot behind my existing fascia? Look for paint that is bubbling or flaking, sections that feel soft when pressed, or dark water staining along the bottom edge. The definitive test is to pry the eavestrough away from the fascia slightly and probe the exposed wood with a screwdriver. Solid wood pushes back. Rotted wood accepts the point with almost no resistance. It is worth doing this check before starting any soffit or fascia project, because finding rotten rafter tails midway through changes the scope considerably.
Want this looked at on your own home?
Book a free, no-obligation in-home assessment.
Book my free assessment →